
The task of recovering deleted partitions from old drives can feel like excavating a lost city. You know the treasures – your precious data – are buried somewhere within, but the digital landscape is often obscured by layers of discarded information, like ancient ruins reclaimed by time and overgrowth. This guide aims to be your archaeological toolkit, equipping you with the knowledge and practical steps to navigate this process, increasing your chances of reclaiming what was lost.
The fear of data loss is a universal one, and it’s amplified when dealing with older drives, which may have served for years, accumulating terabytes of memories, projects, and important documentation. These drives, no matter how ancient in technological terms, hold stories. Sometimes, by accident or through a misunderstanding of disk management, these stories are seemingly erased. This article will walk you through the intricacies of partition recovery, from understanding the underlying principles to employing the right tools and techniques.
When a partition is “deleted,” it’s not quite like a physical object vanishing into thin air. Instead, the operating system essentially erases the navigational markers that tell it where the partition begins and ends on the storage medium. Think of it like tearing out pages from a directory. The information on those pages is still physically present within the book, but the directory itself no longer points to them. The file system tables, which are essentially the roadmaps of your drive, are what get altered.
The Master Boot Record (MBR) and GUID Partition Table (GPT)
At the core of how a drive is organized are partition tables. For older systems, this was predominantly the Master Boot Record (MBR). MBR resides in the very first sector of the hard drive and contains two crucial pieces of information: the boot loader and the partition table itself. The partition table, within MBR, defines the primary and extended partitions on the disk. For modern systems, the GUID Partition Table (GPT) has largely replaced MBR. GPT offers more flexibility, supporting a larger number of partitions and larger drive sizes. Regardless of which scheme your drive uses, its partition table is the vital directory of its organization. When this directory is corrupted or entries are removed, the operating system can no longer “see” the partitions.
File System Structures: The Internal Architecture
Beyond the partition table, each partition contains its own file system structure. This is the internal architecture of the partition, containing information about where files are stored, their names, sizes, and permissions. Common file systems include NTFS (used by Windows), exFAT and FAT32 (widely compatible), and HFS+ (used by macOS). When a partition is deleted, the pointers within the file system to the actual data blocks on the disk are also affected. However, the raw data itself often remains intact until it’s overwritten by new information. This is the fundamental principle that makes partition recovery possible.
Why Data Isn’t Immediately Overwritten
It’s crucial to understand that simply “deleting” a partition doesn’t immediately obliterate the data. The operating system marks the space occupied by the deleted partition as “unallocated.” This essentially tells the system that this space is now available for new data. Until new data is written to these specific sectors, the original data remains, albeit inaccessible through normal operating system functions. This is why prompt action after accidental deletion is paramount. The longer you wait, and the more you use the drive, the higher the chance of overwriting the very data you’re trying to recover.
Physical vs. Logical Deletions
It’s also important to distinguish between logical and physical damage. Logical damage refers to issues with the data structure or file system, which is what we’ll primarily be dealing with when recovering deleted partitions using software. Physical damage, on the other hand, involves actual hardware failure – a clicking hard drive, a drive that doesn’t spin up, or visible damage. This guide focuses on logical recovery. If your drive exhibits signs of physical failure, professional data recovery services are likely your only recourse.
If you’re looking to recover deleted partitions from old drives, you might find valuable insights in a related article that discusses various data recovery techniques and tools. This comprehensive guide covers everything from basic recovery methods to advanced software solutions, ensuring that you have the best chance of retrieving your lost data. For more information, you can read the article here: Recovering Deleted Partitions from Old Drives.
Recognizing the Signs: When a Partition Goes Missing
The discovery of a missing partition can be a jarring experience. Often, the first indication is when you try to access it and it’s simply not there in File Explorer (Windows) or Finder (macOS). This absence can be accompanied by other subtle or not-so-subtle signals.
Drive Not Showing Up as Expected
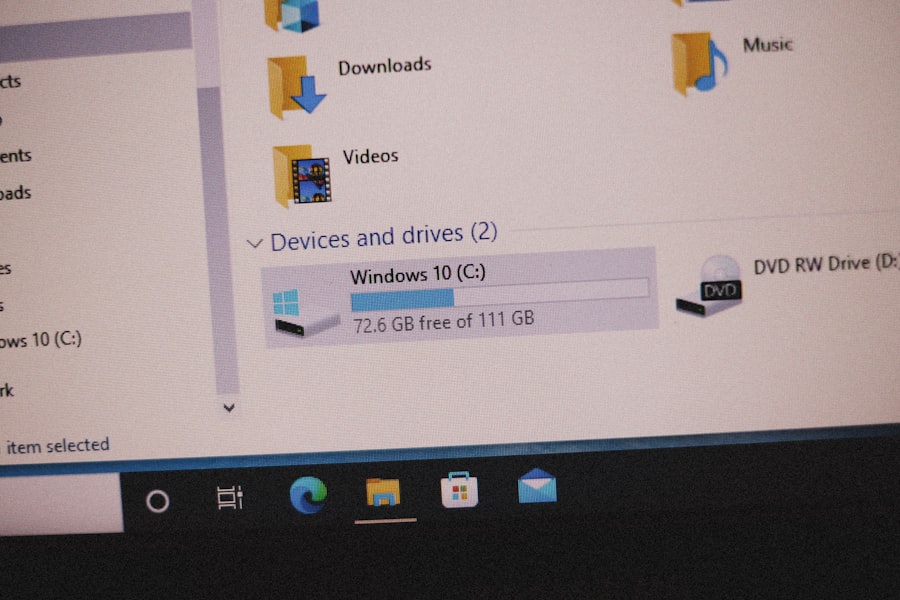
One of the most common scenarios is when a drive appears in Disk Management (Windows) or Disk Utility (macOS) but shows as “Unallocated Space” or an “Unknown Partition” rather than its familiar drive letter and name. The operating system essentially sees a blank canvas where a structured partition used to be. You might also notice that the total capacity reported for the disk is less than what you know it should be, indicating that a portion of its storage is no longer recognized.
Error Messages Upon Boot-Up
In some cases, particularly if the deleted partition contained the operating system, you might encounter boot-up errors. These messages can be cryptic, ranging from “Operating System not found” to specific boot sector errors. These often indicate that the primary boot partition has been compromised or deleted, preventing the system from loading.
Data Recovery Software Detects Unallocated Space
When you run disk analysis tools or data recovery software, they can often scan the raw sectors of the drive and identify areas of unallocated space or “RAW” partitions. These tools bypass the operating system’s interpretation of the drive and look at the underlying data, which is precisely what we need to do to find our deleted partition. This raw view is like seeing the undisturbed earth before you start digging for artifacts.
Accidental Formatting or Partitioning Software Mishaps
The most common culprits for deleted partitions are accidental formatting operations, where a user unintentionally formats the wrong drive or partition, or errors encountered while using partitioning software. Mistakes happen, especially when dealing with the complexities of disk management. The drive itself doesn’t discern intent; it simply executes the commands given.
The Essential Toolkit: Software for Partition Recovery
The heart of any partition recovery operation lies in the software you choose. These digital archaeologists are designed to scan the drive’s raw data, identify remnants of deleted partition tables and file system structures, and reconstruct them. The market offers a variety of options, each with its strengths and weaknesses.
Free vs. Paid Data Recovery Software
There’s a spectrum of solutions, from free utilities to high-end commercial software. Free options can be a good starting point for simple cases, but they often have limitations in terms of features, scan depth, and the amount of data you can recover. Paid software typically offers more advanced scanning algorithms, better support for various file systems and partition types, and often a more user-friendly interface. Think of free software as a basic trowel, while paid software is a more sophisticated set of excavation tools.
Leading Data Recovery Software Recommendations
Several reputable software packages consistently receive high marks for partition recovery. These include:
- EaseUS Partition Recovery Wizard: Known for its user-friendly interface and high success rates. It simplifies the process, making it accessible even for less tech-savvy users.
- Disk Drill: A powerful all-in-one data recovery tool that excels at finding lost partitions and files. It offers a free version with recovery limitations.
- Stellar Data Recovery: A comprehensive suite with various modules, including one specifically for partition recovery. It’s often praised for its ability to handle complex scenarios.
- MiniTool Partition Wizard: Offers a robust free version with essential partition management and recovery features. Their bootable media can be invaluable for system drives.
- R-Studio: A more advanced, professional-grade tool favored by IT professionals. It offers a high degree of control and powerful data recovery capabilities, though it has a steeper learning curve.
The choice of software often depends on the complexity of the situation, your technical comfort level, and your budget. It’s often a good practice to try a free version or a trial first to see if it can detect your deleted partition.
Understanding the Scan Process: Deep Dive vs. Quick Scan
Most data recovery software offers different scanning methods. A “Quick Scan” is faster and looks for recently deleted files and partitions. A “Deep Scan” (sometimes called a full scan or raw scan) is more thorough, examining every sector of the drive for residual data and file system signatures. For deleted partitions, a Deep Scan is almost always necessary to uncover the buried remnants. This process can be time-consuming, sometimes taking many hours, depending on the size of the drive and the speed of your existing drives.
The Importance of a Bootable Recovery Environment
For recovering partitions from a drive that your operating system is currently running from (like your C: drive), it’s critically important to avoid writing any new data to that drive. This is where bootable recovery media comes into play. Many recovery suites allow you to create a bootable USB drive or CD/DVD. You then boot your computer from this media, bypassing the installed operating system. This ensures that no data is inadvertently overwritten on the drive you’re trying to recover. This is like performing surgery without the patient’s vital organs being subjected to further stress.
The Recovery Process: Step-by-Step
Once you have your chosen software and understand the underlying principles, you can embark on the recovery process. It’s a methodical approach that requires patience and attention to detail.
Step 1: Stop Using the Drive Immediately
This cannot be overstated. As soon as you realize a partition is missing or has been deleted, power down the computer or disconnect the drive if it’s an external one. Every second the drive is powered, there’s a risk of the operating system or background processes writing new data, potentially overwriting the very data you need. This is the most crucial step, akin to stopping a leak before it floods the house.
Step 2: Connect the Drive to Another Computer (If Necessary)
If the deleted partition was on your primary operating system drive, or a drive you suspect might be actively written to, it’s best to remove it and connect it as a secondary drive to another working computer. This ensures the drive remains in a static state during the recovery process. You can connect it internally as an additional drive or use a USB-to-SATA/IDE adapter for external connection. This isolation is vital for preserving the integrity of the data.
Step 3: Install and Run Your Chosen Recovery Software
Install the data recovery software on the working computer’s primary drive, not the drive you intend to recover. Once installed, launch the software. The interface will typically guide you through selecting the target drive for the scan.
Choosing the Correct Drive
Carefully select the drive that contained the deleted partition. Mistakes here can lead to scanning the wrong disk, wasting time and potentially causing further issues if you attempt to recover from an incorrect drive. Double-check the drive size and any recognizable partitions.
Step 4: Initiate a Deep Scan
Select the option for a deep scan or full scan. This process will examine the entire physical drive, sector by sector, looking for any traces of lost partition information and file system structures. This is where the software acts like a sophisticated ground-penetrating radar, revealing what lies beneath the surface.
Step 5: Analyze Scan Results and Select Partitions for Recovery
Once the scan is complete, the software will present a list of found partitions, often labeled as “RAW,” “Lost Partition,” or by their previous file system types. You may need to preview the contents of these potential partitions to identify the correct one. Look for familiar folder names or file types.
Previewing Recovered Data
Most reputable software allows you to preview files from the found partitions before committing to a full recovery. This is a critical step to verify that you’ve found the correct partition and that the data within it is intact and readable. It’s like examining a retrieved artifact for authenticity and completeness.
Step 6: Recover the Selected Partition
Once you’ve identified the correct partition(s), select them for recovery. You will then be prompted to choose a different destination drive to save the recovered partition data. Never recover data to the same drive from which you are recovering. Doing so will overwrite the very data you are trying to save. Ensure the destination drive has enough free space to accommodate the entire recovered partition.
Step 7: Verify Recovered Data
After the recovery process is complete, navigate to the destination drive and verify that the recovered partition appears correctly and that your files are accessible and intact. Open a few key files to ensure they are not corrupted.
If you’re looking to recover deleted partitions from old drives, you might find it helpful to explore a related article that provides detailed insights and step-by-step instructions. This resource can guide you through the recovery process and help you understand the tools available for data restoration. For more information, check out this informative piece on recovering deleted partitions.
Dealing with Tricky Scenarios and Advanced Techniques
| Metric | Description | Typical Value / Range | Notes |
|---|---|---|---|
| Success Rate | Percentage of deleted partitions successfully recovered | 60% – 95% | Depends on drive condition and time since deletion |
| Average Recovery Time | Time taken to scan and recover partitions | 10 minutes – 2 hours | Varies with drive size and software used |
| Supported File Systems | File systems that recovery tools can handle | NTFS, FAT32, exFAT, EXT3/4, HFS+ | Depends on recovery software capabilities |
| Drive Age | Age of the drive from which partitions are recovered | 1 year – 10+ years | Older drives may have more physical damage |
| Data Integrity | Percentage of recovered data that is intact and usable | 70% – 90% | Corruption may occur if overwritten or damaged |
| Common Recovery Tools | Popular software used for partition recovery | TestDisk, EaseUS Data Recovery, MiniTool Partition Recovery | Open-source and commercial options available |
| File Overwrite Risk | Likelihood that deleted partition data has been overwritten | Low to High | Higher if drive was used after deletion |
Not all partition recovery situations are straightforward. Sometimes, you might encounter corrupted partition tables or a drive that’s not even recognized by the operating system. In these more challenging scenarios, a few advanced techniques can increase your chances of success.
Corrupted Partition Table Repair
Some data recovery software includes tools specifically designed to repair corrupted partition tables. These tools attempt to rebuild the missing or damaged entries in the MBR or GPT, allowing the operating system to recognize the partition again without necessarily recovering the entire partition as a new entity. This is akin to patching up a damaged roadmap rather than redrawing the entire area from scratch.
Sector-by-Sector Disk Imaging
For drives that are showing signs of instability or are not reliably accessible, creating a sector-by-sector disk image is a wise precaution. This creates an exact replica of the entire drive, including all its sectors, whether they contain data or are unallocated. You can then perform recovery operations on this image file instead of directly on the potentially failing drive. This is like making a perfect wax impression of a delicate artifact before attempting any cleaning or repair.
Creating Disk Images with ddrescue or FTK Imager
Tools like ddrescue (a Linux command-line utility) or AccessData’s FTK Imager (a free Windows tool) are excellent for creating forensic images of drives. These images are bit-for-bit copies and are invaluable for preserving data, especially from failing hardware.
Recovering from Unallocated Space Only
If the data recovery software finds only unallocated space but no readily identifiable partition structure, it means the partition table information might be too severely damaged. In such cases, the software will try to find individual files based on their file signatures. This is more akin to data recovery from a formatted drive, where you’re looking for intact files rather than a whole partition structure.
Understanding File System Signatures
During deep scans, data recovery software looks for unique patterns of bytes in the raw data that identify specific file systems (like NTFS, FAT32) or file types (like JPEGs, DOCs). When a partition is deleted, these signatures can still be present, allowing the software to piece together data. This is like finding recognizable pottery shards to identify a lost civilization.
Preventing Future Data Loss: Best Practices and Proactive Measures
While this guide focuses on recovery, the most effective strategy against data loss is prevention. Implementing good data management habits can save you considerable stress and effort in the long run.
Regular Backups: The Unsung Hero
The most critical preventative measure is to implement a robust backup strategy. This means regularly backing up your important data to multiple locations. A local backup on an external hard drive is essential, but cloud backups offer an additional layer of protection against physical disasters like fire or theft. Think of backups as a reliable safety net, always ready to catch you if you fall.
Types of Backups: Full, Incremental, and Differential
- Full Backup: Copies all selected data.
- Incremental Backup: Copies only the data that has changed since the last backup (regardless of type).
- Differential Backup: Copies only the data that has changed since the last full backup.
Understanding these types helps you create an efficient backup routine.
Disk Management Best Practices: Think Before You Click
When working with disk management tools, always take a moment to confirm the drive and partition you are about to modify. Double-check labels, sizes, and any warnings displayed by the software. A few extra seconds of caution can prevent hours of recovery work. This is the digital equivalent of looking both ways before crossing a busy street.
Using Partition Management Software Wisely
If you need to resize, create, or delete partitions, use reputable software and follow its instructions carefully. Avoid experimenting with unfamiliar tools or performing operations when you’re tired or distracted. Many experienced users prefer to create a backup before making any significant changes to their disk partitions.
Healthy Drive Habits: Monitoring and Maintenance
Periodically check the health of your drives using S.M.A.R.T. (Self-Monitoring, Analysis and Reporting Technology) tools. Many motherboards and operating systems can report on drive health. Also, run regular disk error checking (chkdsk on Windows) to identify and fix potential file system errors before they escalate.
Understanding Data Overwriting
Remember that once data is overwritten, it’s exceptionally difficult, often impossible, to recover. This reinforces the importance of pausing all disk activity as soon as you suspect data loss. The longer you delay, the more the digital sands might shift, burying your lost data deeper.
By understanding the mechanics of partition deletion, equipping yourself with the right tools, and following a methodical recovery process, you significantly improve your chances of reclaiming valuable data from old drives. However, always remember that prevention through regular backups and careful disk management is your most powerful ally in the ongoing battle against data loss. The digital realm can be unforgiving, but with knowledge and diligence, you can emerge victorious.
FAQs
What causes partitions on old drives to get deleted?
Partitions on old drives can be deleted due to accidental formatting, file system corruption, virus attacks, improper shutdowns, or using disk management tools incorrectly.
Is it possible to recover deleted partitions from old hard drives?
Yes, it is often possible to recover deleted partitions from old hard drives using specialized data recovery software or professional data recovery services, provided the data has not been overwritten.
What tools are commonly used to recover deleted partitions?
Common tools for recovering deleted partitions include TestDisk, EaseUS Partition Recovery, MiniTool Partition Wizard, and Recuva. These tools scan the drive to locate lost partitions and restore access to the data.
Can I recover deleted partitions from SSDs the same way as from HDDs?
While the recovery principles are similar, SSDs use different technology such as TRIM, which can make recovery more difficult. Prompt action is critical to improve chances of successful recovery on SSDs.
What precautions should I take before attempting partition recovery?
Before attempting recovery, avoid writing new data to the drive, create a disk image if possible, use reliable recovery software, and follow instructions carefully to prevent further data loss. If unsure, consult a professional.