Capturing Moments: The Art of Vignette Photography
I’ve always found myself drawn to the edges of a frame, to the subtle fading that can guide the viewer’s eye or create a sense of intimacy. Vignette photography, for me, is less about a dramatic flourish and more about a controlled whisper, a way to sculpt light and attention within the visual narrative. It’s an art form that, when executed thoughtfully, can elevate a simple image into something more evocative and impactful. This isn’t about drowning an image in darkness or relying on a digital filter to do the heavy lifting. It’s about understanding the interplay of light, subject, and composition to create a deliberate visual effect.
The appeal of the vignette lies in its ability to direct focus. In a world saturated with information and visual stimuli, our eyes are constantly scanning, trying to find anchor points. A well-placed vignette acts as a navigational tool, gently leading the viewer’s gaze to the most important element of the photograph. It’s a form of visual storytelling that doesn’t shout, but rather invites the viewer into a more personal experience with the image.
Understanding the Core Concept
At its heart, a photographic vignette is a darkening or lightening of the outer edges of an image, drawing the viewer’s attention towards the center. This effect can be achieved both in-camera through lens characteristics or lighting techniques, and in post-processing using editing software. While the digital world has made it incredibly easy to apply a vignette with a few clicks, the true art lies in understanding why and how to use it effectively, rather than simply as a default setting.
The Natural Vignette
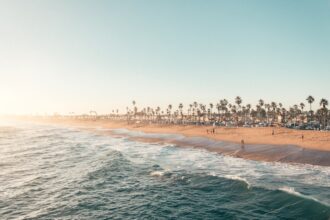
It’s important to acknowledge that some degree of vignetting is a natural phenomenon in photography. Lenses, particularly those with wide apertures, can produce a darkening effect at the edges due to the angle at which light rays enter the lens and the physical limitations of the lens barrel. This can be a desirable characteristic, adding a subtle depth and helping to isolate the subject without overpowering the image. Understanding this inherent quality of lenses is the first step in appreciating the more deliberate application of vignetting.
Post-Processing: A Double-Edged Sword
While post-processing offers immense control, it also carries the risk of overuse. A heavily vignetted image can feel artificial, look dated, or even distract from the subject if not applied with restraint. The key is to use it as a tool to enhance, not to mask or fundamentally alter, the intrinsic qualities of the photograph. I often view it as a gentle nudge, not a forceful push.
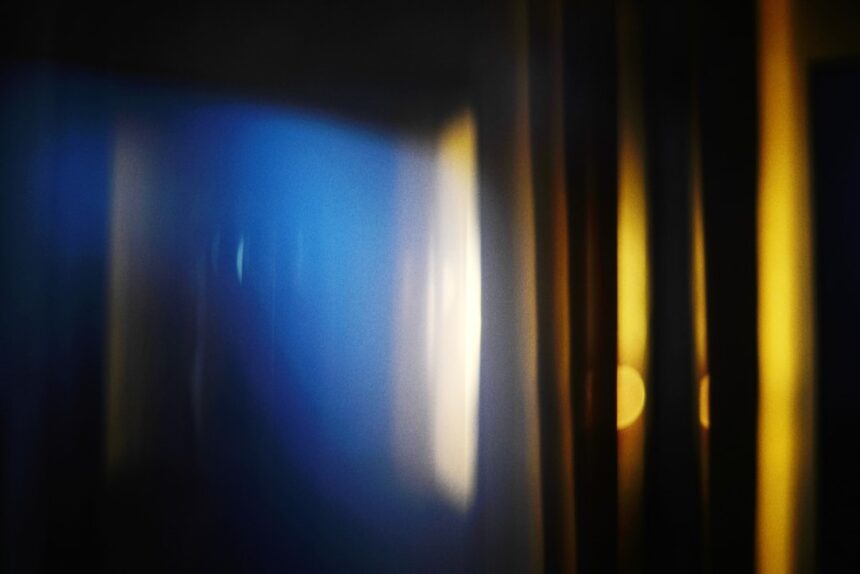
The heavy vignette effect combined with a shallow depth of field can create striking visual compositions that draw the viewer’s attention to the subject while adding a dramatic flair to the overall image. For those interested in exploring this technique further, a related article can be found at this link, which delves into the artistic applications and technical considerations of using vignetting and depth of field in photography.
In-Camera Techniques for Subtle Vignetting
The most authentic and often the most pleasing vignettes are those that are born in the moment of capture. While digital post-processing is prevalent, understanding how to generate a natural vignette in-camera opens up a different level of control and appreciation for the photographic process.
Lens Choice: The Foundation of Natural Vignette
The lens itself plays a significant role in the presence and intensity of a natural vignette. Many prime lenses, especially those with faster apertures (lower f-numbers), tend to exhibit a more pronounced natural vignette. This is often a characteristic that photographers have historically leaned into, recognizing its ability to draw attention to the central subject. When I choose a particular lens, I often consider the characteristics of its vignette and how it might complement the subject matter.
Wide-Aperture Benefits
Shooting with wide apertures, such as f/1.8 or f/1.4, not only creates a shallower depth of field, blurring the background and further isolating the subject, but it also inherently contributes to a natural vignette. This combination of shallow depth of field and mild edge darkening can create a very pleasing, almost cinematic quality to an image. It’s a way to mimic the way the human eye perceives depth and focus, with the periphery naturally being less sharp and less illuminated.
Telephoto vs. Wide-Angle
While telephoto lenses generally exhibit less of a natural vignette, wide-angle lenses can be more prone to it, especially at their widest focal lengths and widest apertures. This is due to the physics of light bending and the physical size of the lens elements. Understanding these tendencies allows me to anticipate and work with the lens’s characteristics.
Lighting: Sculpting with Light and Shadow
Beyond lens choice, lighting is perhaps the most powerful tool for in-camera vignette creation. Strategic placement of light sources can naturally darken the periphery of the scene, guiding the viewer’s eye without any digital manipulation.
Rembrandt Lighting and Clamshell Lighting
Techniques like Rembrandt lighting, which involves a triangle of light on the subject’s cheek, naturally create shadow areas on other parts of the face and in the background. Similarly, clamshell lighting, where a light source is placed above and another below the subject, can also influence how light falls off towards the edges of the frame. My approach is often to consider where the primary light is coming from and how that light will naturally fall off or be blocked from reaching the edges of the scene.
Using the Environment
The environment itself can be a tool. Shooting a subject in a doorway, under an overhang, or with surrounding darker elements can naturally create a vignetting effect. I’ve found myself actively looking for these opportunities to use the existing environment to my advantage, finding darker corners or creating naturally shadowed areas that frame the subject.
Post-Processing: Refining and Enhancing the Vision
While in-camera techniques are ideal, post-processing is an indispensable tool for refining and sometimes even creating a vignette. However, the emphasis should always be on enhancement rather than a wholesale creation of an effect that detracts from the original image.
The Graduated Filter: Soft Transitions
The graduated filter in editing software is a personal favorite for applying subtle vignettes. It allows for a gradual transition from darker to lighter areas, mimicking the natural fall-off of light. This creates a much more organic and less abrupt darkening effect than a radial or elliptical vignette.
Strategic Placement
The placement of the graduated filter is crucial. It should follow the lines of the composition, enhancing the existing sense of depth and focus. I often align the gradient with the horizon line or with the direction of the subject’s gaze to create a sense of natural flow.
Opacity and Amount Control
The key to a successful graduated filter vignette is judicious use of opacity and amount controls. I rarely push these to their maximum, aiming for a subtle darkening that is just noticeable enough to draw attention without being overtly visible as a filter. It’s about achieving a balance where the viewer’s eye is guided, but the transition is smooth.
The Radial Filter: Focused Isolation
The radial filter is excellent for creating a more pronounced darkening effect around a specific subject or area of interest. It allows for the creation of an elliptical or circular darkening area, with the ability to feather the edges for a softer transition.
Feathering for Naturalism
The feathering of a radial filter is paramount to its success. A high feather value creates a gradual blend into the surrounding image, making the darkening appear more natural and less like a painted-on effect. I tend to use very high feather values, often exceeding 70-80% to ensure a smooth integration.
Varying the Shape
While often circular, the radial filter can be adjusted to be more elliptical, which can be particularly useful for framing subjects that are not perfectly centered or for following the lines of a particular object. This flexibility allows for a more tailored approach to isolating elements within the frame.
Dedicated Vignette Tools: Precision and Control
Most editing software offers dedicated vignette tools that provide specific controls for amount, midpoint, roundness, and feathering. These tools offer a good balance of simplicity and control.
Understanding the Controls
I always take the time to understand what each slider does. The “midpoint” slider dictates how far into the image the darkening extends, while “roundness” controls the shape of the vignette. “Feather” dictates the softness of the transition. By experimenting with these, I can fine-tune the effect to precisely match my intention.
Subtle Adjustments
When using dedicated vignette tools, I approach them with the same philosophy as other editing tools: subtle adjustments. A little goes a long way, and it’s often more effective to make several small adjustments rather than one large one.
The Psychological Impact of Vignettes
The use of vignettes is not solely about aesthetics; it taps into our psychological perception of light and focus. Understanding these underlying principles can elevate the use of vignettes from a purely technical application to a more profound storytelling tool.
Guiding the Viewer’s Gaze
Our brains are wired to find interest in illuminated areas. A well-executed vignette capitalizes on this, naturally drawing the viewer’s eye to the brightest, most focused part of the image. It’s a silent director, telling the viewer where to look and what to prioritize.
Directing Attention to the Subject
The most common application is to direct attention to the main subject. By darkening the periphery, the subject virtually pops out from the background, becoming the undeniable focal point. This is especially effective in portraits and still life photography.
Creating a Sense of Depth
A vignette can also contribute to a sense of depth within a two-dimensional image. The darkening at the edges can make the center of the image appear closer, while the darker periphery recedes, creating a visual dimensionality.
Evoking Emotion and Atmosphere
The type and intensity of a vignette can significantly influence the emotional response to an image. Darker, more pronounced vignettes can evoke feelings of nostalgia, intimacy, or even melancholy, while lighter, more subtle vignettes might suggest openness or clarity.
Nostalgia and Memory
A classic sepia-toned vignette can instantly evoke a sense of nostalgia, reminiscent of old photographs and stored memories. The fading edges suggest the passage of time and the treasured nature of the captured moment.
Intimacy and Enclosure
A strong vignette can create a sense of intimacy, as if the viewer is peeking into a private moment or being drawn into a confined, personal space. This is often used in portraiture to foster a connection between the subject and the viewer.
The heavy vignette effect combined with a shallow depth of field can create stunning visual narratives in photography, drawing the viewer’s attention to the subject while softly blurring the background. For those interested in exploring this technique further, a related article offers insights into how to effectively implement these effects in your own work. You can read more about it in this informative piece on photography techniques at this link.
Applications Across Genres
Vignettes are not limited to a single photographic style. Their versatility allows them to be effectively employed across a wide range of genres, each with its own specific nuances and intentions for their use.
Portraiture: Isolating the Subject
In portrait photography, vignettes are invaluable for isolating the subject and drawing attention to their face, eyes, and expression. They help to eliminate distracting background elements and create a more intimate connection.
Headshots and Close-Ups
For headshots and close-up portraits, a subtle vignette can frame the face, emphasizing key features and conveying a sense of directness. I often use a very soft, almost imperceptible vignette here to avoid drawing attention to itself.
Environmental Portraits
In environmental portraits, where the background plays a role in telling the subject’s story, a vignette can be used more selectively to frame the subject within their surroundings, preventing the background from becoming overwhelming.
Landscape Photography: Directing the Eye to Key Features
While landscapes are often about vastness, a vignette can be used to focus attention on a specific element within the scene, such as a magnificent tree, a dramatic mountain peak, or a winding river.
Focusing on a Single Element
If a landscape has a particularly strong foreground element or a captivating mid-ground focus, a vignette can be used to draw the eye towards it, preventing the viewer from being overwhelmed by the sheer scale of the scene.
Enhancing the Mood
A dark vignette can enhance the mood of a dramatic landscape, for instance, emphasizing the brooding atmosphere of a stormy sky or the quiet solitude of a misty forest.
Still Life and Product Photography: Highlighting Details
In still life and product photography, precision and detail are paramount. Vignettes can be used to highlight the textures, forms, and key features of the objects being photographed.
Emphasizing Texture and Form
For objects with intricate textures or interesting shapes, a vignette can draw the viewer’s eye to these details, showcasing the craftsmanship and artistry involved.
Creating a Sense of Elegance
A refined vignette can lend an air of elegance and sophistication to product shots, making the item appear more desirable and premium.
Ethical Considerations and Avoiding Pitfalls
As with any powerful tool, the use of vignettes comes with responsibilities. There are common traps that photographers can fall into, leading to images that are less effective or even detrimental to the overall impact.
The Danger of Overuse
The most significant pitfall is undoubtedly overuse. A vignette that is too dark, too large, or too strong can quickly make an image look amateurish, dated, or simply distracting. It’s like over-seasoning food; once it’s too much, it ruins the dish.
Knowing When to Stop
The key is to ask oneself: is the vignette truly enhancing the image, or is it just… there? If in doubt, err on the side of less. A subtle vignette is almost always better than an obvious one.
Maintaining Naturalism
The goal is often to create a vignette that appears natural, as if it were a product of the lighting or the lens. If the viewer consciously notices the vignette, it’s likely too strong.
Ensuring Subject Visibility: The Primary Goal
While vignettes guide attention, they should never obscure the main subject. The purpose is to draw the eye, not to hide the subject in shadow.
Maintaining Exposure
Even with edge darkening, ensure that the subject remains well-exposed and clearly visible. Adjust the vignette’s intensity and range to achieve this balance.
Contrast and Clarity
A vignette should complement, not detract from, the clarity and contrast of the subject. If the vignette is causing the subject to lose detail or impact, it needs to be adjusted or removed.
Avoiding Artificiality
The digital age has made it easy to apply overly strong or perfectly symmetrical vignettes, which can look artificial. The most effective vignettes often have irregular shapes and subtle imperfections.
Embracing Asymmetry
Real-world lighting rarely creates perfectly symmetrical darkening. Embracing slight asymmetry in the vignette can lend it a more organic feel.
Feathering is Your Friend
As mentioned before, the feathering of a vignette is crucial for its natural appearance. A soft transition is key to avoiding that “painted-on” look. My approach is always to feather as much as possible.
In conclusion, vignette photography, when approached with intention and restraint, is a powerful artistic tool. It’s about understanding the interplay of light, composition, and the psychology of perception to subtly guide the viewer, enhance the subject, and imbue an image with a specific mood or atmosphere. It’s a craft that rewards patience, practice, and a keen eye for detail, allowing me to elevate my images beyond a simple capture to a more compelling visual narrative.
FAQs
What is the heavy vignette effect?
The heavy vignette effect refers to a photography technique where the edges of the image are darkened, drawing the viewer’s attention towards the center of the frame. This effect can create a dramatic and moody atmosphere in the photograph.
What is shallow depth of field?
Shallow depth of field refers to a photography technique where only a small portion of the image is in sharp focus, while the rest of the image appears blurred. This technique is often used to isolate the subject from the background and create a sense of depth in the photograph.
How are heavy vignette effect and shallow depth of field related?
The heavy vignette effect and shallow depth of field are often used together to create visually striking and impactful photographs. The combination of these techniques can draw the viewer’s attention to the focused subject in the center of the frame, while also adding a sense of depth and atmosphere to the image.
What types of photography are heavy vignette effect and shallow depth of field commonly used in?
The heavy vignette effect and shallow depth of field are commonly used in portrait photography, still life photography, and artistic or creative photography. These techniques can add a sense of drama and visual interest to the subject, making them popular choices for artistic and expressive photography.
How can I achieve the heavy vignette effect and shallow depth of field in my own photography?
To achieve the heavy vignette effect, you can use editing software to darken the edges of your image, or use a lens with a natural vignetting effect. To achieve shallow depth of field, you can use a wide aperture (such as f/2.8 or wider) and focus on your subject, while allowing the background to blur. Experimenting with these techniques and practicing will help you master the heavy vignette effect and shallow depth of field in your own photography.