The digital landscape is no longer a void; it’s a complex, interconnected web. In this web, the ability to precisely locate and identify our digital and physical assets is becoming increasingly crucial. I’ve found that a small, unassuming device, the Raspberry Pi, has become an indispensable tool in my journey to map these assets. It’s not a superhero, but rather a diligent cartographer, quietly charting the territories of my digital and physical world.
Before diving into the mechanics, it’s essential to grasp why mapping assets is more than just a technical exercise. It’s about gaining control and understanding. Imagine your digital life as a sprawling city. Without a map, you might struggle to find specific buildings (files), understand traffic flow (network activity), or even identify derelict areas (unused resources). Similarly, in the physical realm, knowing the precise location of every tool in your workshop, every sensor in your smart home, or every asset in a small business inventory can save significant time and prevent costly errors. The Raspberry Pi, with its versatility and low cost, acts as a powerful, pocket-sized surveyor.
Defining “Assets” in the Context of Mapping
When I speak of “assets,” I refer to a broad spectrum of items. These can be:
- Digital Assets: This includes files, databases, network devices (routers, switches, printers), servers, virtual machines, and even active processes running on your computers. Understanding where these reside and how they interact is fundamental to cybersecurity and efficient resource management.
- Physical Assets: Think of hardware components, specialized equipment, inventory items in a small business, or even IoT devices scattered throughout a home or facility. The ability to track their physical location, when combined with digital identifiers, creates a powerful synergy.
The Value Proposition: Control and Efficiency
The primary benefit of asset mapping, particularly with a tool like the Raspberry Pi, boils down to two core principles: control and efficiency.
- Enhanced Control: By knowing precisely where your assets are and how they relate to each other, you gain a deeper level of control. This is critical for security, ensuring that sensitive data is where it should be, and for operational management, guaranteeing that critical systems are accounted for.
- Improved Efficiency: Time is a valuable commodity, and searching for lost or misplaced assets, whether digital or physical, is a direct drain on it. A well-maintained asset map allows for rapid retrieval of information, streamlining workflows and reducing operational friction.
Using a Raspberry Pi to map assets can significantly enhance inventory management and tracking processes in various industries. For a deeper understanding of how to implement this technology effectively, you can refer to a related article that provides insights and practical tips. Check out this informative piece at Mapping Assets with Raspberry Pi to learn more about the benefits and applications of this innovative approach.
The Raspberry Pi as a Mapping Node: Hardware and Software Synergy
The Raspberry Pi’s strength lies in its ability to act as a central hub or a distributed sensor. It’s a tiny computer, but its potential as a mapping node is immense. It can be programmed to collect data, analyze it, and report back, forming the backbone of my asset mapping infrastructure.
Choosing the Right Raspberry Pi Model
While virtually any Raspberry Pi can be repurposed for asset mapping, some models offer distinct advantages depending on the scale and demands of your project.
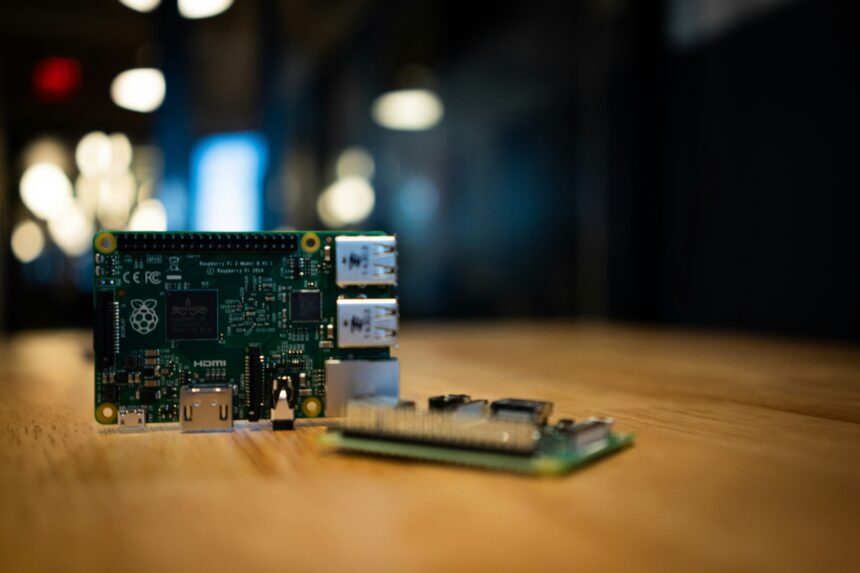
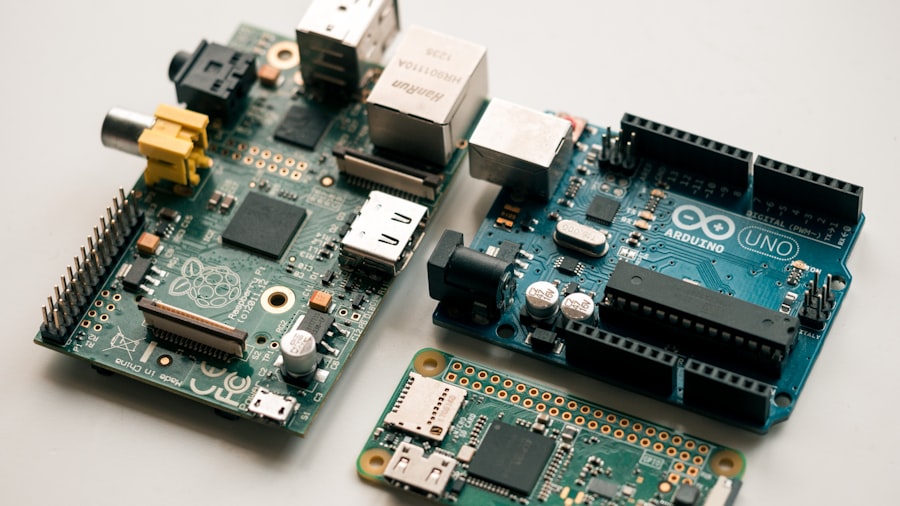
- Raspberry Pi 4 Model B: This is my go-to for most projects. Its increased RAM (up to 8GB), faster processor, and Gigabit Ethernet port make it a robust choice for running more demanding applications, such as network scanning tools or even a small database. It’s like having a seasoned explorer with a comprehensive toolkit.
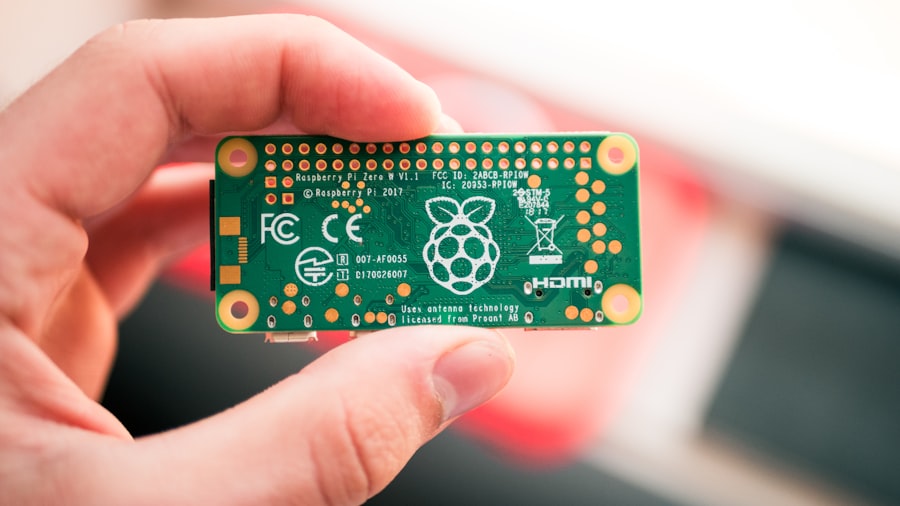
- Raspberry Pi Zero W/2 W: For scenarios where power consumption is a concern or where I need a distributed network of many small, inexpensive mapping points, the Zero line is excellent. Its Wi-Fi connectivity means it can operate wirelessly, making it ideal for placing in locations where running Ethernet cables is impractical. These are like agile scouts, able to venture into remote territories.
- Raspberry Pi Compute Module: For a more integrated or custom solution, the Compute Module allows for embedding Raspberry Pi functionality into larger systems or custom PCBs. This is for when I need to build a specialized mapping device that’s seamlessly integrated.
Essential Peripherals for Mapping Operations
Beyond the Pi itself, a few peripherals can significantly enhance its mapping capabilities.
- SD Card: The operating system and mapping software reside here. A high-quality, reputable SD card is crucial for reliability and performance. Think of this as the cartographer’s essential parchment.
- Power Supply: A stable and adequate power supply is non-negotiable for consistent operation. Brownouts can corrupt data and disrupt mapping efforts.
- Case (Optional but Recommended): A case protects the Pi from dust, physical damage, and accidental shorts.
- Network Connectivity: Ethernet is preferred for stability and speed, but Wi-Fi is essential for distributed deployments.
- USB Devices (Optional): Depending on the mapping task, I might connect USB drives for temporary storage, webcams for visual identification, or specialized sensors.
Operating System Considerations: Raspberry Pi OS is Key
The foundation of any embedded system is its operating system. For the Raspberry Pi, Raspberry Pi OS (formerly Raspbian), a Debian-based distribution, is the most common and well-supported choice.
- Lightweight and Efficient: Raspberry Pi OS is optimized for the Pi’s hardware, ensuring that mapping applications run smoothly without unnecessary resource overhead.
- Extensive Software Repository: It provides access to a vast array of command-line tools and graphical applications that are essential for network scanning, data collection, and management.
- Community Support: The large and active Raspberry Pi community means that troubleshooting common issues is often straightforward, and there are abundant tutorials and guides available.
Network Asset Mapping: Discovering the Digital Neighbors
One of the most immediate applications of the Raspberry Pi in asset mapping is discovering and inventorying devices on a network. This acts as the initial reconnaissance mission, identifying all the digital inhabitants of my connected spaces.
Network Scanning Tools: The Digital Radar
Several powerful command-line tools, readily available on Raspberry Pi OS, allow me to scan my network and identify active devices.
- Nmap (Network Mapper): This is the undisputed king of network scanning. I use Nmap religiously for its ability to perform port scanning, OS detection, and service version detection.
- Host Discovery:
nmap -sn 192.168.1.0/24will ping every IP address in the subnet to identify live hosts. This is like sending out feelers to see who’s home. - Port Scanning:
nmap -p 1-1024 192.168.1.1will scan the first 1024 ports on a specific IP address to identify open services. Knowing which ports are open tells me what the device is capable of doing or offering. - Service Version Detection:
nmap -sV 192.168.1.1attempts to determine the specific version of services running on open ports. This level of detail is crucial for vulnerability assessment. - Masscan: For very large networks or when speed is paramount, Masscan can scan an entire internet range in minutes. While less detailed than Nmap by default, it’s incredibly efficient for initial sweeps. Think of it as a high-speed aerial survey.
- arp-scan: This tool uses ARP requests to discover hosts on a local network. It’s fast and effective for quick scans within a single subnet.
Device Identification and Fingerprinting
Once devices are discovered, the next step is to identify them. This goes beyond just an IP address and MAC address.
- MAC Address Vendor Lookup: The first three octets of a MAC address (the OUI) often indicate the manufacturer of the network interface card. This provides an initial clue about the device type.
- Service Banners and HTTP Headers: When scanning open ports, services often return banners (small pieces of text) or HTTP headers that reveal their identity and version. For instance, an Apache web server will announce itself.
“`bash
curl -I http://
“`
This command fetches HTTP headers from a web server and can reveal the server software.
- SNMP (Simple Network Management Protocol): For managed network devices like switches and routers, SNMP can provide a wealth of information, including device name, model, serial number, and interface details. I configure SNMP on my network devices and then query them with tools like
snmpwalkon the Pi. - NetBIOS and LLMNR: On Windows-dominated networks, these protocols can reveal hostnames and workgroup information.
Maintaining a Network Asset Inventory
The data gathered from network scans needs to be organized into a structured inventory.
- CSV Files: A simple yet effective way to start is by exporting scan results to CSV files. I can then use spreadsheet software to manage and filter the data.
- Databases: For more complex inventories, I might set up a local SQLite database on the Raspberry Pi or even a more robust solution like PostgreSQL if the need arises. This allows for more sophisticated querying and relational data management.
- Open-Source Inventory Management Tools: Projects like Snipe-IT (though often self-hosted on a more powerful server, it can be accessed and managed via a Pi) or Ralph offer more comprehensive asset management features. These are like sophisticated digital filing cabinets, with search and categorization capabilities.
Physical Asset Mapping: Bringing the Tangible into Focus
Mapping physical assets often requires combining the Raspberry Pi’s digital capabilities with sensors or manual input. It’s about giving a digital address and description to the things you can touch.
IoT Device Tracking with the Raspberry Pi
The rise of the Internet of Things presents a unique challenge and opportunity for asset mapping. My smart home devices, lab equipment, and even security sensors are all “assets” that can benefit from being mapped.
- Bluetooth Low Energy (BLE) Beacons: I can deploy BLE beacons (small, battery-powered transmitters) with unique identifiers. A Raspberry Pi equipped with a Bluetooth adapter can periodically scan for these beacons and log their presence and proximity. This is excellent for tracking the general location of items within a room or area.
- Scanning for Beacons: Tools like
hcitool lescanor Python libraries likepybluezorbleakcan be used on the Pi to discover BLE devices and their advertised data. - RFID (Radio-Frequency Identification): For more precise location tracking of tagged items, RFID readers connected to the Raspberry Pi can scan RFID tags. This is particularly useful for inventory management in workshops or small warehouses.
- RFID Reader Integration: Depending on the RFID reader (e.g., MFRC522, PN532), I’ll use specific Python libraries to interface with the GPIO pins of the Raspberry Pi to read tag IDs.
- GPS Integration (for Mobile Assets): For assets that move across larger areas (e.g., vehicles, shipped goods), a Raspberry Pi can be paired with a GPS module. The Pi can then log location data and transmit it periodically, effectively creating a real-time tracking system.
Integrating with Existing Infrastructure
Often, my physical assets are already part of a larger system or environment.
- Building Management Systems (BMS): In larger facilities, a Raspberry Pi can act as a gateway to collect data from BMS sensors (e.g., temperature, humidity, door status) and map these to specific physical locations within the building.
- Camera Integration and Object Recognition: A Raspberry Pi with a camera module can be used for visual asset identification. Projects involving basic object recognition can help tag and locate items that don’t have electronic identifiers. While not perfect, it can supplement other methods.
Manual Input and Verification
Not all physical assets are easily automated. For items like tools, furniture, or important documents, manual input remains valuable.
- Web Interfaces: I can develop simple web applications hosted on the Raspberry Pi that allow authorized users to enter asset details, assign them to locations, and update their status.
- QR Codes: Assigning QR codes to physical assets is a very low-tech yet effective method. A user with a smartphone or a Raspberry Pi with a barcode scanner can scan the QR code, which can then link to a database entry or provide detailed information about the asset and its location.
Using a Raspberry Pi to map assets can greatly enhance inventory management and tracking efficiency. For those interested in exploring this innovative approach further, a related article provides valuable insights and practical tips on implementing such a system effectively. You can read more about it in this detailed guide that covers various applications and configurations for using Raspberry Pi in asset mapping. This resource will help you understand the potential of this versatile device in streamlining your asset management processes.
Data Storage and Management: The Cartographer’s Archive
| Metric | Description | Typical Value | Notes |
|---|---|---|---|
| Processor | Raspberry Pi model used for asset mapping | Quad-core ARM Cortex-A72 (Raspberry Pi 4) | Higher processing power improves data handling and mapping speed |
| RAM | Memory available for running mapping software | 4 GB or 8 GB | More RAM allows for smoother multitasking and larger datasets |
| Storage | Local storage for map data and logs | 32 GB microSD card or higher | Use high-speed cards for faster read/write operations |
| GPS Accuracy | Precision of location data collected | 2-5 meters (with external GPS module) | Depends on GPS module quality and environmental conditions |
| Power Consumption | Energy usage during mapping operations | 3-7 Watts | Depends on peripherals and processing load |
| Data Transmission | Method of sending collected data | Wi-Fi / Ethernet / LoRa | Choice depends on range and network availability |
| Mapping Software | Software used for asset mapping | Open-source GIS tools (e.g., QGIS, OpenStreetMap) | Software choice affects ease of use and features |
| Deployment Duration | Typical continuous operation time | Up to 24 hours (with external battery pack) | Battery capacity and power management are critical |
The raw data collected from network and physical scans is only useful if it’s stored and managed effectively. The Raspberry Pi can serve as a miniature data center for this information.
Local Storage Solutions
For smaller-scale operations or initial deployments, local storage on the Raspberry Pi is often sufficient.
- Text Files (CSV, JSON): As mentioned earlier, simple text-based formats are easy to generate and parse.
- SQLite: This is a lightweight, serverless SQL database engine that is perfect for embedded applications. I use SQLite extensively for storing structured asset data directly on the Pi’s SD card or an external USB drive. It offers ACID compliance and good query performance for single-user applications.
“`bash