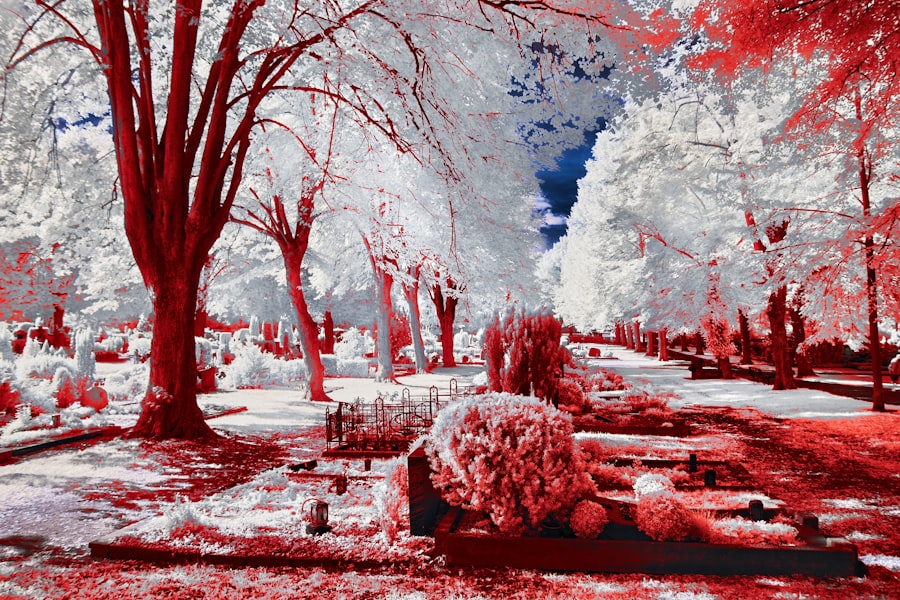
I’ve always been drawn to the tactile quality of surfaces. The worn leather of an old book, the rough grain of untreated wood, the subtle imperfections in a ceramic glaze – these are the details that breathe life into an image. Photoshop’s Texturize filter, at its core, attempts to replicate this, to imbue a flat digital image with a sense of physical depth and material character. It’s a powerful tool, capable of transforming a sterile photograph into something visceral, something that feels almost touchable. However, as with any tool that manipulates reality, there’s a fine line between enhancement and fabrication, between adding believable texture and creating something that screams “fake.” My journey in mastering this filter has been one of experimentation, frustration, and ultimately, a deeper understanding of how to integrate it seamlessly, avoiding the pitfalls of digital forgery.
The Texturize filter isn’t a magic wand; it’s a set of sliders and controls that interact with your existing image in specific ways. Before I can effectively deploy it, I need to understand precisely what it’s doing.
How the Filter Interprets Source Images
At its heart, the Texturize filter analyzes the tonal values of a chosen texture image. It’s not simply overlaying pixels; it’s interpreting the light and shadow within that texture to dictate how it will affect the target image. Darker areas in the texture will generally lead to darker areas in the target, and lighter areas will lead to lighter areas. The intensity of this effect is then controlled by a “Scaling” slider, which dictates how much of the texture’s luminance information is applied.
The Role of Texture Image Selection
The most critical component, aside from the target image itself, is the texture image I choose. This initial decision lays the groundwork for the entire outcome. A poorly chosen texture will inevitably lead to a result that feels artificial.
The Importance of Contrast and Detail
I’ve learned that textures with a good range of tonal values – from deep shadows to bright highlights – tend to yield the most convincing results. A texture that is too flat, too uniformly gray, will struggle to create any meaningful depth when applied. Similarly, a texture lacking fine detail will result in a broad, indistinct application of ‘texture’ that doesn’t read as a specific material.
Matching Texture to Intended Material
This might seem obvious, but it’s a step I sometimes rushed in my earlier days. If I want to make a digital painting look like aged canvas, I need to select an image of actual aged canvas, not a brick wall. The nuances of the texture – the weave pattern of the canvas, the pores of the brick – are what the filter will attempt to emulate.
Navigating the Filter’s Sliders
Once I have a suitable texture loaded, I’m presented with the core controls: Scaling, Relief, and often a Light direction. Each plays a crucial role in shaping the final appearance.
Scaling: The Strength of the Impression
This slider, as I mentioned, controls the overall intensity of the texture’s influence. A higher scaling means the texture’s luminance values will have a stronger impact on the target image. Too low, and the effect is barely perceptible. Too high, and it can quickly overpower the original image, creating muddy or distorted areas.
Relief: Mimicking Three-Dimensionality
Relief is where the filter begins to simulate depth. It essentially pushes pixels around based on the texture’s luminance, creating the illusion of raised or recessed areas. This is a powerful control, but one that requires a delicate touch. Excessive relief can lead to an unnatural, almost carved appearance.
Light Direction: Casting Shadows
The Light direction slider is fascinating because it dictates the simulated source of light that will cast shadows within the applied texture. This is crucial for creating a sense of volume. If the light is coming from the left, shadows will fall to the right. Incorrectly aligning the simulated light with the existing lighting in my target image is a major red flag for forgery.
The Photoshop Texturize filter has been a popular tool for artists and designers, but its potential for forgery raises important ethical questions. For a deeper understanding of how this filter can be misused and the implications it has on digital art authenticity, you can read a related article that explores these issues in detail. Check it out here: Understanding Forgery in Digital Art: The Role of Photoshop Filters.
Strategies for Believable Integration
The Texturize filter, when used in isolation, often produces a predictable and often jarring effect. The key to avoiding forgery lies in how I integrate this effect into my workflow, making it a supporting element rather than the sole focus.
Blending Modes: The Art of Subtle Overlap
This is where I unlock a significant amount of control and subtlety. Simply applying the Texturize filter on its own, on a layer above my target image, rarely looks natural. By changing the blending mode of the texture layer, I can control how it interacts with the pixels beneath.
Overlay and Soft Light: Enhancing Luminance Differences
These are my go-to blending modes for texture. Overlay often enhances the contrast between the texture and the underlying image, making the texture’s features more prominent. Soft Light offers a gentler approach, acting more like a subtle lighting effect. Both are excellent for bringing out the inherent textures of a subject without completely obscuring it.
Multiply and Screen: Deeper Shadows and Brighter Highlights
Multiply can be used to deepen shadows based on the texture, adding a sense of grime or age. Screen, conversely, can brighten areas, simulating the effect of light catching on raised surfaces. I use these more sparingly, as they can quickly lead to blown-out highlights or crushed blacks.
Linear Burn and Dodge: Targeted Adjustments
These modes are more aggressive and can be useful for specific effects. Linear Burn darkens the image based on the texture’s luminance, while Linear Dodge brightens. I find these best for when I want a very specific, localized textural effect.
Opacity: The Sweet Spot of Subtlety
The opacity slider on the texture layer is arguably the most important tool for avoiding a fake appearance. I often find myself pulling back the opacity considerably from the default 100%. A texture that is too strong is immediately noticeable and screams artificiality. Finding that “sweet spot” where the texture adds character without dominating is critical.
The “Less is More” Principle
This is a mantra I repeat to myself frequently. A subtle hint of texture is often more effective than a bold, obvious application. I aim for a result where the viewer feels the texture rather than consciously sees it as a superimposed effect.
Conditional Opacity Adjustments
I don’t always set a single opacity for the entire layer. Sometimes, I might use layer masks to selectively reduce the opacity of the texture in certain areas, such as smooth skin or the sky, where a strong texture would look out of place.
Layer Masks: Selective Application and Refinement
Layer masks are indispensable for controlling where and how the texture filter is applied. I rarely apply the filter directly to my main image layer. Instead, I duplicate my image, apply the filter to the duplicate, and then use a layer mask on that duplicated layer to reveal or conceal the effects of the texture.
Feathering for Smooth Transitions
When working with masks, I always utilize feathering. This softens the edges of the mask, creating a gradual transition between the textured area and the untouched areas of the image. Hard, abrupt edges where the texture begins or ends are a dead giveaway of a digital manipulation.
Masking for Specific Surfaces
I’ll often create elaborate masks to ensure the texture only appears on surfaces that would naturally have it. For example, if I’m texturizing a wooden table, I’ll mask out any reflections or metallic hardware that shouldn’t be affected.
Avoiding the “Plastic” Look: Key Considerations for Realism
The most common pitfall I encounter when experimenting with the Texturize filter is the creation of a “plastic” or overtly digital aesthetic. This happens when the texture doesn’t react realistically with the underlying image.
Light Interaction and Consistency
Every element within a photograph has a relationship with light. When I apply a texture, it needs to adhere to the existing lighting conditions. If my original image has dramatic highlights and shadows, my applied texture needs to complement, not contradict, those light sources.
Aligning Simulated Light with Real Light
As I mentioned, the Light direction slider within the Texturize filter is crucial here. I always pay close attention to the direction of light in my original image and try to match the simulated light direction as closely as possible. If my image has a strong light source from the upper right, I’ll set the Light direction parameter to reflect that.
Avoiding Uniform Shadows and Highlights
If the shadows and highlights created by the texturizing effect are uniform across the entire image, regardless of the object’s form, it looks artificial. I look for how the texture interacts with the planes and curves of the subject, ensuring the simulated light and shadow follow those contours realistically.
Maintaining Original Image Details
The Texturize filter can easily obscure or destroy subtle details within the original image. My goal is to add texture, not obliterate the original subject. This requires careful calibration.
Preserving Edges and Fine Features
I’m always vigilant about how the filter affects the edges of my subjects. If the texture starts to bleed into sharp edges or soften them unnaturally, I know I’ve gone too far. I might need to reduce the scaling, adjust the relief, or use masking to protect these critical areas.
The Danger of Over-Relief
Excessive relief can make objects look like they’ve been carved or stamped, rather than naturally textured. This is especially true for organic subjects. I aim for a subtle undulation that mimics natural surface variations, not a dramatic, sculpted appearance.
Advanced Techniques for Seamless Forgery Avoidance
Once I have a solid grasp of the fundamentals, I can begin to explore more nuanced approaches to make the Texturize filter truly undetectable as a manipulation.
Combining Different Texture Applications
Rarely does a single application of the Texturize filter suffice for complex scenes. I often find myself layering multiple instances of the filter, each with different textures and settings, to build up a convincing material.
Texturizing Different Elements Separately
For example, in a still life, I might apply one texture to a wooden surface, another to a metallic object, and a third, much subtler texture to fabric. This allows me to control the exact character of the texture for each material.
Using Textures for Subtle Enhancement, Not Just Surface Detail
I’ve also learned to use textures for more than just simulating the material of an object. I might use a subtle canvas texture to add a bit of artistic grain to a digital painting, or a slight paper texture to a photograph to give it a more vintage photographic feel.
Companion Filters and Adjustments
The Texturize filter is often just one piece of a larger puzzle. I frequently use other Photoshop tools in conjunction with it to enhance realism.
Noise Filter for Organic Imperfection
Sometimes, even with the Texturize filter, the result can appear too clean or digital. Applying a very subtle amount of noise (often using the Add Noise filter) can help break up any digital artifacts and make the texture feel more organic and imperfect, much like real-world materials.
Dodge and Burn for Sculpting Depth
After applying a texture, I often use the Dodge and Burn tools to selectively enhance or reduce the perceived depth. This allows me to further refine the interplay of light and shadow, making the texture feel more integral to the object’s form.
Color Balance for Integration
The texture itself might have a slightly different color cast than the original image. I’ll often use color balance adjustments, or even color overlay blending modes on separate layers, to harmonize the color of the applied texture with the overall image.
The Power of Observation and Reference
Ultimately, my ability to avoid forgery with the Texturize filter comes down to my observational skills. I need to constantly be looking at real-world examples of the textures I’m trying to emulate.
Studying Real-World Materials
I spend time looking at how light interacts with different surfaces in my everyday life. I notice the subtle variations in brickwork, the subtle sheen on polished metal, the unevenness of painted surfaces. This visual library is invaluable when I’m trying to recreate those effects digitally.
Using Reference Images Effectively
When working on a specific project, I’ll often gather reference photographs of the exact type of material I’m trying to portray. This helps me to understand the common patterns, the typical imperfections, and the way light behaves on that particular surface.
The Photoshop Texturize filter has gained attention for its potential use in forgery, particularly in the realm of digital art and photography. This technique can manipulate images in ways that may mislead viewers regarding the authenticity of the artwork. For a deeper understanding of the implications of such digital manipulation, you can explore a related article that discusses the ethical considerations and consequences of using Photoshop in this manner. Check out this insightful piece on the subject at AMI Wrong Here.
When Less is Truly More: Recognizing the Line
| Filter Name | Forgery Technique | Impact |
|---|---|---|
| Photoshop Texturize | Forgery by adding texture to an image to make it appear different | Can be used to manipulate the appearance of an image, leading to misinformation or deception |
There are times when the best application of the Texturize filter is to not use it at all, or to use it so sparingly that it’s virtually imperceptible. Understanding when to stop is just as important as knowing how to apply it.
The Over-Texturized Image: A Clear Warning Sign
I’ve seen many images where the texture is so pronounced that it detracts from the subject matter. The viewer’s eye is drawn to the artificial grain or pattern, rather than the intended focal point. This is a clear indication that the filter has been overused.
Distinguishing Enhancement from Distraction
My goal is to enhance the visual appeal and realism of an image, not to make it a showcase for my Photoshop skills. If the texture becomes a distraction, it has failed in its purpose.
Recognizing the “Digital Stamp” Effect
A common tell-tale sign of over-texturizing is when the texture looks like a uniform “stamp” applied across the image. This often happens when the texture’s contrast is too high, or the scaling is too aggressive, leading to a repetitive and unnatural pattern.
The Subtle Whisper of Texture
The most convincing uses of the Texturize filter often involve a very subtle application. The texture might be so muted that it’s difficult to pinpoint exactly what’s different, but the image simply feels more grounded, more tangible.
The “Airbrushing” Analogy
Think of it like airbrushing in traditional art. When done poorly, it looks obvious and artificial. But when done skillfully, it can create incredibly smooth transitions and subtle shading that enhance the overall rendering. The Texturize filter, at its best, operates on a similar principle of subtle enhancement.
Letting the Original Image Shine Through
Ultimately, my work in Photoshop aims to serve the original image. The Texturize filter is a supporting player, not the star of the show. If the texture begins to overshadow the subject, the composition, or the emotional impact of the photograph, then I have crossed the line into forgery. My continued practice with this filter is about learning to be a good storyteller, using every tool at my disposal to create a believable narrative, not to invent one from scratch.
FAQs
What is the Photoshop Texturize filter forgery?
The Photoshop Texturize filter forgery is a technique used to create a forged or altered image using the Texturize filter in Adobe Photoshop. This filter is typically used to add texture to an image, but it can also be manipulated to create a forged or altered image that appears authentic.
How does the Photoshop Texturize filter forgery work?
The Photoshop Texturize filter forgery works by using the Texturize filter to add texture to an image in a way that alters the appearance of the image. This can include adding or removing elements from the image, changing the texture of the image, or creating a completely new image that appears authentic.
What are the potential consequences of using the Photoshop Texturize filter forgery?
Using the Photoshop Texturize filter forgery to create forged or altered images can have serious consequences, including legal repercussions for misrepresenting the authenticity of an image. Additionally, it can damage the credibility and trustworthiness of the individual or organization responsible for the forged or altered image.
How can the Photoshop Texturize filter forgery be detected?
The Photoshop Texturize filter forgery can be detected through careful examination of the image, including analysis of the texture and elements within the image. Additionally, forensic analysis and comparison with original or authentic images can help identify signs of forgery.
What are some tips for preventing the use of the Photoshop Texturize filter forgery?
To prevent the use of the Photoshop Texturize filter forgery, it is important to establish and enforce strict ethical guidelines for image manipulation. Additionally, educating individuals on the potential consequences of using the Texturize filter for forgery can help deter its misuse. Using watermarking and digital signature techniques can also help verify the authenticity of images.